Lesson 2: PowerPoint Overview
When you start PowerPoint, PowerPoint displays the Title Slide in the Slide pane. You can type the title of your presentation and a subtitle on this side. To enter text on the Title Slide:
- Click and type the title of your presentation in the "Click to add title" area.
- Click and type a subtitle in the "Click to add subtitle" area.
If you do not wish to use the Title Slide, choose Edit > Delete slide from the menu to delete it.
Create New Slides
After completing your title slide, you can create additional slides. To create a new slide:
- Do one of the following:
- Choose Insert > New Slide from the menu.
- Click the New Slide button
 .
. - Press Ctrl-M.
The Apply Slide Layout pane will appear on the right side of the screen. The Apply Slide Layout pane provides you with slide templates you can use when creating your PowerPoint presentation. There are four types of Text Layout templates.
Title Slide - The Title Slide contains two text placeholders that you can use to display a title and a subtitle of your presentation.
Title Only - The Title Only slide contains a single placeholder. You can use it to display a title.
Title and Text - The Title and Text template provides a placeholder for a title and a placeholder for text.
Title and 2 Column Text - The Title and Text template provides a placeholder for a title and two placeholders for text.
- To select a layout, click the layout you want in the Apply Slide Layout pane. The layout will then appear in the Slide pane.

- To add text, click inside the placeholder and type.
- To add an additional slide to your presentation do one of the following:
- Right-click on the slide layout. A menu will appear. Choose Insert New Slide.
- Click the down arrow next to the slide layout. A menu will appear). Choose Insert New Slide.
![]()
Change Your Slides
After creating a slide, if you want to add text:
- Place the cursor at the point at which you would like to add text.
- Type the information you want to add.
If you would like to change text:
- Highlight the text you want to change.
- Type the new text.
You can use the backspace key to delete text. You can also delete text by highlighting the text and pressing the Delete key.
Apply a Design Template
Design templates provide attractive backgrounds for your PowerPoint slides. To apply a design template:
- Do one of the following:
- Choose Format > Slide Design from the menu.
- Click the Slide Design icon
 .
.
Design templates will appear on the right side of the screen.
- To apply a design template to all of the slides in your presentation
do one of the following:
- Click on the design template.
- Right-click on the template. A menu will appear. Choose Apply to All Slides.
- Click on the down arrow next to the template. A menu will appear. Choose Apply to All Slides.
Correct Spelling
Using the PowerPoint spell checker, you can check the spelling in you PowerPoint documents.
- To start spell check, do one of the following:
- Choose Tools > Spelling from the menu.
- Press F7.
- Click the Spell Check icon.
If there are possible spelling errors, the Spelling dialog box will open.
| Task | Procedure |
| Do not change spelling. | Click Ignore. |
| Correct spelling. |
|
| Add to Dictionary. | Click Add. |
| Word is Correct. Do not change document. | Click Ignore All. |
| Word is incorrect. Change entire document. | Click Change All. |
Sorter View
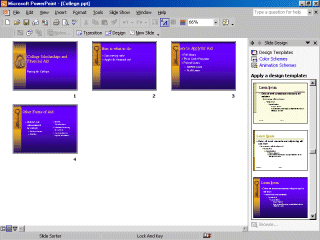
After you have created your PowerPoint slides, you can move, cut, copy, paste, duplicate, navigate, and view them in Sorter view. To view the slides in Sorter view, do one of the following:
- Choose View > Slide Sorter from the menu.
- Click the Slide Sorter View icon.

Slide Sorter View |
|
| Task | Procedure |
Move to first slide. |
Ctrl-Home |
Move to last slide. |
Ctrl-End |
Move to next slide. |
Right arrow |
Move to previous slide. |
Left arrow |
Select a slide. |
Single-click |
Open slide in Normal view. |
Double-click slide. |
Select slides. |
Select a single slide:
|
Select multiple slides:
|
|
Delete a slide. |
|
|
|
Copy a slide. |
|
|
|
|
|
Paste a slide |
|
|
|
|
|
Cut a slide |
|
|
|
|
|
Move a slide |
|
Duplicate a slide |
|
|
|
Run Your PowerPoint Slide Show
Once you have created your slides, you can run your Slide Show:
- Do any one of the following:
- Press F5.
- Choose Slide Show > View Show from the menu.
- Click the Slide Show icon , which is located in the bottom left corner of your screen.
Your slideshow will appear on your screen.
Navigating the Slideshow |
|
| Task | Procedure |
| Go to the next slide. | Do one of the following:
|
Go to the previous slide. |
Do one of the following:
|
Print Your Slides
PowerPoint provides you with many printing options. You can print a large view of your slides or you can print your slides as handouts with 1, 2, 3, 4, 6 or 9 slides per page. You can also print your Notes pages or the Outline view of your slides.
To print:
- Choose File >Print Preview from the menu. The Print Preview area will open.
- Click the down arrow next to the Print What field.
- Select what you would like to print.
- Click the Print icon. The Print dialog box will open.
- Select whether you want your slides to print in color, grayscale, or black and white. If you are using a black and white printer, choose black and white. You will use less ink or toner.
- Check whether you want your slides to print vertically or horizontally.

